Multiple approaches exist for sharing calendars with team members in Microsoft Teams.
Shared Microsoft Outlook Calendars
A shared Microsoft Outlook calendar helps teams keep track of events, appointments, and tasks. To find, share, and create shared Microsoft Outlook calendars, refer to Microsoft Outlook Calendar (teamdynamix.com).
Channel Calendars in Microsoft Teams
The Microsoft Teams Channel Calendar app streamlines meeting scheduling within a team by consolidating all channel meetings into a single calendar. This app filters to display meetings specific to the channel where it is installed, facilitating easier participation by team members.
To use the Channel Calendar in Microsoft Teams:
- Open Microsoft Teams.
- Navigate to the desired team for the channel calendar.
- In the tab navigation area next to "Posts" and "Files," click the + symbol to add a new tab.
- Select "Channel calendar" from the options.
- Assign a name to the channel calendar.
See also: See all your meetings in Microsoft Teams (microsoft.com).
Schedule Meetings
To schedule meetings within a specific channel of the team:
- Using the Channel Calendar app:
- Open the app within the team.
- Click + Add new event.
- Fill in the necessary details for the meeting. The channel and team information will already be filled in. Add any additional attendees as needed.
- Using the Calendar on the Microsoft Teams sidebar:
- Click + New meeting.
- Complete the meeting details. Unlike the Channel Calendar app, the channel and team information must be manually added. Include any required attendees.
Notifications
Channel meetings are announced in the respective channel, and any team member can join if desired. Attendees will receive notifications only if they are directly invited or if group settings are modified to send calendar event notifications to all members.
To activate notifications for all calendar events:
- Go to https://outlook.office.com/groups/ithaca.edu/ in a web browser.
- Select the relevant team or Microsoft 365 group.
- Select the gear icon under the team or group name to access Group Settings.
- Under "Manage group email," select Receive all email and events.
With this setting enabled, all team members will receive notifications about channel meetings.
Events in Microsoft Planner
You can display upcoming Planner tasks through Microsoft Planner and Microsoft Outlook.
View Tasks in Calendar View
- Go to https://tasks.office.com/ithaca.edu/en-US/Home/Planner/ in a web browser.
- Select the relevant plan.
- At the top of the Planner board, select Schedule.
Publish Tasks to Outlook
- Go to https://tasks.office.com/ithaca.edu/en-US/Home/Planner/ in a web browser.
- Select the relevant plan.
- At the top of the Planner board, select the ellipsis and then select Add plan to Outlook calendar.
- If prompted, select Publish, and then select Add to Outlook to publish the calendar to Microsoft Outlook.
View Plan and Tasks in Outlook
- Go to https://outlook.office.com/calendar/ in a web browser.
- Under Other calendars, select your plan.
- Select a Planner task in the calendar to see a quick view of the Planner task.
Events in Microsoft SharePoint
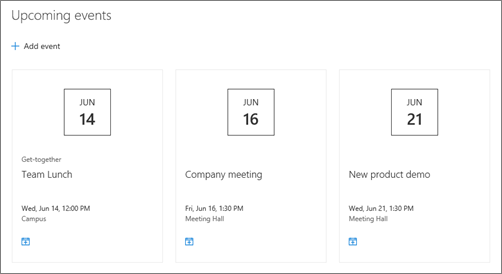
You can display upcoming events on your SharePoint page or within your Microsoft Teams by creating a SharePoint page and adding an Events web part. If you need assistance in setting this up, request a Business Productivity team consultation.
Note: Recurring events are not supported, even if you manually set up a recurrence in the events list that you are using. You'll need to create a new event for each occurrence.
Create the Events Page
- Go to https://ithacaedu.sharepoint.com/ in a web browser.
- On the left-side menu, select SharePoint Sites.
- Choose the SharePoint site linked to your team. For example, if your team in Microsoft Teams is named "Demonstration Team," look for a SharePoint site called "Demonstration Team."
- Once on your SharePoint site, select + New and then select Page.
- Select a template for your events page.
- After the page is created, assign a title to it.
- To add the Events web part, hover your cursor above or below an existing web part, or below the title region. Select the + symbol, then select the Events web part.
- Select on the Edit web part icon (left side) to configure the Events web part settings.
- Choose a source for your events. Typically, select Events list on this site.
- If your list includes categories, you can select one to filter the displayed events.
- Choose a date range to filter your events from the Date range dropdown list.
- Select a layout for the events display.
- Finally, select Publish to make the page public.
To use the Events page in Microsoft Teams:
- Open Microsoft Teams.
- Navigate to the desired team for the channel calendar.
- In the tab navigation area next to "Posts" and "Files," click the + symbol to add a new tab.
- Select "SharePoint Pages" from the options.
- Select the events page you created within the list.
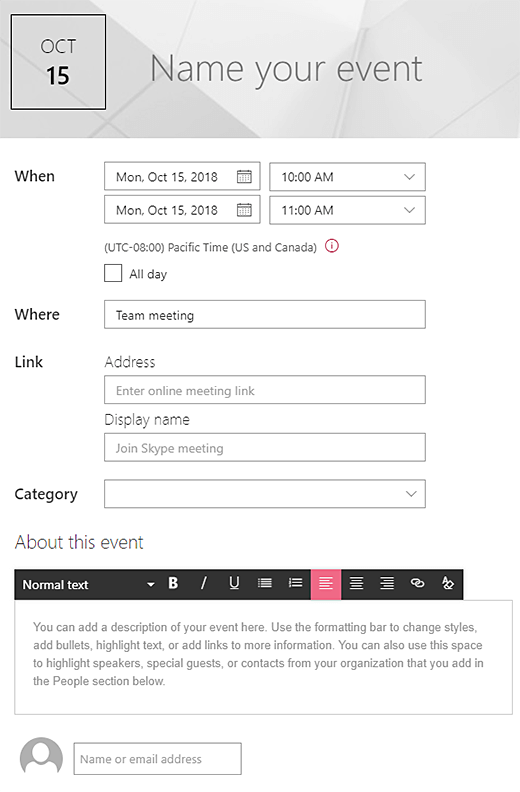
Add Events
To add events to the published page, follow these steps:
- Select Add event.
- At the top of the page, enter a name for your event. Optionally, add an image to the title area by selecting the Add image button in the upper left corner.
- Enter the event date and time in the When section.
- In the Where section, enter a location or address. If the location is recognized, you have the option to include a map.
- If your event is online, enter the meeting link in the Link section. Place the link in the Address box and add a Display name for it. If you don’t add a link, this section won't be displayed in the event.
- Optionally, select a Category for the event. You can also create a new category by typing it in.
- Provide details in the About this event section.
- If you want to highlight certain people, add their names below the event description. Note that only users from your organization can be added.
- Select Save to finish.