Audience
This article is intended for all IC campus visitors who plan to use the wireless network available in the residence halls, MyResNet-5G.
Contents
- Creating an account
- Adding Devices
- How to locate your device's MAC address
- Additional Information about locating the MAC Address on different devices
Please Note: These step by step instructions are possible to follow on a singular device but you will have a much simpler time if you can access a secondary device that is already connected to the Internet.
Creating An Account & Adding Devices
- Open a web browser on your secondary (if possible) device and visit https://ithaca.apogee.us/
- Below the welcome banner, or in the top right of the page, click on the "Sign In" button and enter your Ithaca College email address when prompted.
- Once logged in, click the "Add Device" button.
- Click on the first drop-down menu and select what type of device you are adding.
- Give the device a recognizable name.
- You will now need to enter the MAC Address for the device. (See additional instructions listed below for help finding the MAC Address, or use the MAC Address Help link, if needed).
- Now is a great time to change your Personal Wifi Password to something that you will remember. This password will be entered any time you connect a new or existing device to the "MyRestNet-5G" Network.
- On the device that you are adding, select the "MyResNet-5G" (or "MyResNet-2G") network and enter your Personal WiFi Password (step 7) to connect.
MAC Address Settings Per Device
The randomized MAC address option is configured for each wireless connection, so there is no way to configure this setting globally.
-
Apple Watch
- Open the Settings app, then tap Wi-Fi.
- Tap the name of the network you joined. If you haven't joined the network yet, swipe left on its name and tap more
 .
.
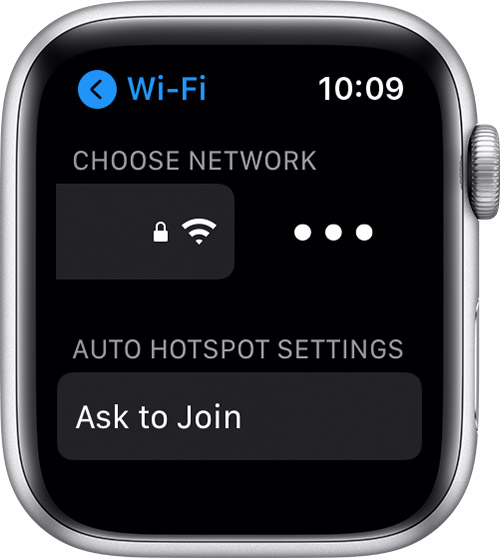
- Tap to turn Private Address on or off.

-
Android (By default this MAC Randomizer will be enabled once the device is updated to Android 10)
- Open the Settings app.
- Tap Network & Internet.
- Tap Wi-Fi.
- Tap the gear icon associated with the wireless connection to be configured.
- Tap Advanced.
- Tap Privacy.
- Tap Use Device MAC.

Additional Information about locating the MAC Address on different devices
To find the MAC Address for Game Consoles, follow these general instructions to get started. For additional information, refer to your device manual or manufacturer's website.
- Select the Menu and then select System Settings.
- Select Internet Settings.
- Select Other Information, and then select Confirm MAC Address to display the MAC address.
- From the home screen, select Settings (gear icon) > System.
- Select System Software > Console Information to display the MAC address.
Note: This device supports both wired and wireless connections. Decide how you will connect before obtaining a MAC address, as addresses are based on connection type.
- Select the Menu and then select Settings.
- Select System > System Information to display the MAC address.
Note: This device supports both wired and wireless connections. Decide how you will connect before obtaining a MAC address, as addresses are based on connection type.
- Plug the LAN Adapter into the USB port on your Wii.
- Power on your Wii.
- From the home screen, select the Wii button (lower left).
- Select Wii Settings.
- Select the right arrow and select Internet.
- Select Console Information to display the MAC address.
Note: If the LAN Adapter MAC Address reads 00-00-00-00-00-00, consult your device manual to look up your MAC address on a computer.
- Select the Wii U menu and then select System Settings.
- Select Internet.
- Select View MAC Address to display the MAC address
- Press the Xbox button on your controller to open the guide.
- Select Profile & system > Settings.
- Select General > Network settings.
- Select Advanced settings > IP Settings to display the MAC address.
Note: This device supports both wired and wireless connections. Decide how you will connect before obtaining a MAC address, as addresses are based on connection type.
- Select the Settings tile.
- Select the Network tile.
- Select Advanced Settings to display the MAC address.
Note: This device supports both wired and wireless connections. Decide how you will connect before obtaining a MAC address, as addresses are based on connection type.
- From the Xbox Dashboard, select System > Network Settings.
- Select Edit Settings.
- Select the Additional Settings tab.
- Select the Advanced Settings section to display the MAC address (bottom).
Note: This device supports both wired and wireless connections. Decide how you will connect before obtaining a MAC address, as addresses are based on connection type.
Find the MAC Address for Digital Assistants, Smart and Streaming Devices
Follow these general instructions to get started. For additional information, refer to your device manual or manufacturer's website.
Digital Assistants
- Download and install the Amazon Alexa app on your phone or computer.
- Log in with an Amazon Account.
- When prompted, connect to the Echo device Wi-Fi.
- The MAC address will be listed under Echo Setup (bottom).
- Download and install the Google Home app on your mobile device.
- Open the application and follow the prompts.
- Tap the Menu (upper left).
- Tap Devices, and then tap Google Home.
- Tap Settings. The MAC Address is listed under Information.
For additional support, visit Google Home Help.
Smart Devices
The MAC address and serial number will be listed on the base of the LIFX bulb. For a bulb with serial number D07123456789, the MAC address would be D0:71:23:45:67:89.
- Select Network Settings > Network Status. The MAC Address is listed on the screen.
Note: This device supports both wired and wireless connections. Decide how you will connect before obtaining a MAC address, as addresses are based on connection type.
Streaming Devices
- Select Menu from the Home screen.
- Select Settings > Device Info. The address appears in the Wi-Fi MAC Address field.
- Select Settings > About. The address will be listed Ethernet ID (wired connection) or Wireless ID (wireless connection) depending on your preference.
Note: This device supports both wired and wireless connections. Decide how you will connect before obtaining a MAC address, as addresses are based on connection type.
- Select Settings > Device > Network > [Select Connected Network] > Status to view the MAC address.
- Select Settings > Network and then locate the Wireless MAC Address.
Find the MAC Address for Handheld Gaming Devices, Tablets and Ereaders
Follow these general instructions to get started. For additional information, refer to your device manual or manufacturer's website.
Handheld Gaming
- Select Settings.
- Select Nintendo Wi-Fi Connection Setup or Nintendo WFC Setup.
- Select Options > System Information to display the MAC address.
- Select System Settings > Internet Settings > Other Information.
- Select Confirm MAC Address to display the MAC address.
- Select Settings from the main menu.
- Select System Settings > System Information to display the MAC address.
Tablets and Ereaders
- Tap Settings > General > About. The MAC address appears in the Wi-Fi Address field.
- Tap Settings from the home screen.
- Tap More > Device. The MAC address appears in the WiFi MAC Address field.
- Tap the Menu button on the home screen.
- Tap Settings.
- Tap the Menu button.
- Tap Device Info. The MAC address appears in the WiFi MAC Address field.
- Tap the Home button.
- Tap Settings to display the MAC address.
- Tap the Nav Arrow on the bottom of the screen.
- Tap Settings > Device Info.
- Tap About Your Nook to display the MAC address.